The reason?
The Dress.
My daughter is in her final year of school, and as the year draws to an end, the time has come for her Matric Farewell Ball, known as a Prom in other parts of the world.
My sweet little angel has some very strong points of view, but when it came to deciding on her dress (2 months before the event), she did not really know what she wanted - neither colour nor style. When her date's mother asked about the colour of the dress, so that HIS outfit could be co-ordinated with hers, she had to decide quickly.
There were some unnegotiable "don't's":
Strapless - dangerous and dodgy
Seams on the bodice - its ugly
Naked back - the guy must not feel weird touching her when they dance
Too short - no feet showing
Too shiny
And some "do's":
Unique
Organic
Comfortable
Beautiful
Youthful
Femine
I must make it
If ever you had done sewing, you might see some problems developing here, but lets continue...
Design being part of her DNA, Nina's ideas started flowing.
... the bodice must look as if it is wrapped around her body left over right ...
... the skirt must have varying layers of soft, flowy fabric, like a flower ...
... beautiful and unique shoulder straps ...
... tiny, rounded little waves on the bodice ...
... laced-up back, but delicate laces. And only a hint of skin...
... sexy, but not revealing ...
Ja well no fine!
Then came the colour.
She considered champagne, but that did not do her skin tone justice. So we set out on a colour-hunt, and after quite a search, we found the most beautiful chiffon. She had to choose between two tones: a golden fabric with a coppery sheen, and a coppery fabric with a golden sheen.
Being Nina, she immediately saw the possibilities: if we used both in the dress, it would add depth and interest to the design.
So we bought both.
The only thing that remained to be sourced, were her unique shoulder straps. Nina suggested that we buy bridal lace and colour it, but I felt that it might be easier to ask somebody to crochet the straps.
Combining fabric and all the ideas, this was more or less what Nina envisioned:
 In the meanwhile, I had to start working on the pattern for the dress, as I could not find anything that resembled the above closely enough.
Oh, by the way, have I mentioned that I am NOT a skilled seamstress?
First of all, I made a copy of her body using duct tape. I Googled it and found a nice tutorial at http://www.threadsmagazine.com/item/16297/create-a-custom-dress-form The dressform was not that difficult to make and was way less expensive than a real dressmakers dummy.
Unfortunately, I was so scared of squeezing the life out of my child, that I worked a little light-handedly. The dressform was too big and I had to do some reconstructive surgery, resulting in a slightly odd-shaped body-double. At least the most important measurements were correct and I could start working.

I first studied a number of youtube clips on "draping". That is, the construction of a pattern using a dummy and flat pieces of fabric. I learned a lot and got some really handy hints at http://www.youtube.com/watch?v=KBtvl1-Wk3k
I draped chiffon around the dressform to create a natural flowing shape, and then marked out the shape.


Next I marked the natural drape of the fabric on the dummy:


These lines were then enhanced using a thin black silk ribbon pinned onto the dummy.


This was done to make the lines visible for the next step, which was draping. I've seen it being done in movies, but have never tried it myself. It worked like a charm:


I completed this stage by making the pattern pieces. Remember to add a seam allowance before sewing the pieces together.

The pieces were cut out and sewn for the first draft of the bodice. Despite my best efforts (and due to my desire not to squeeze the life out of my darling daughter when I made the dummy), some adjustments still had to be made. This was easy to fix, though.
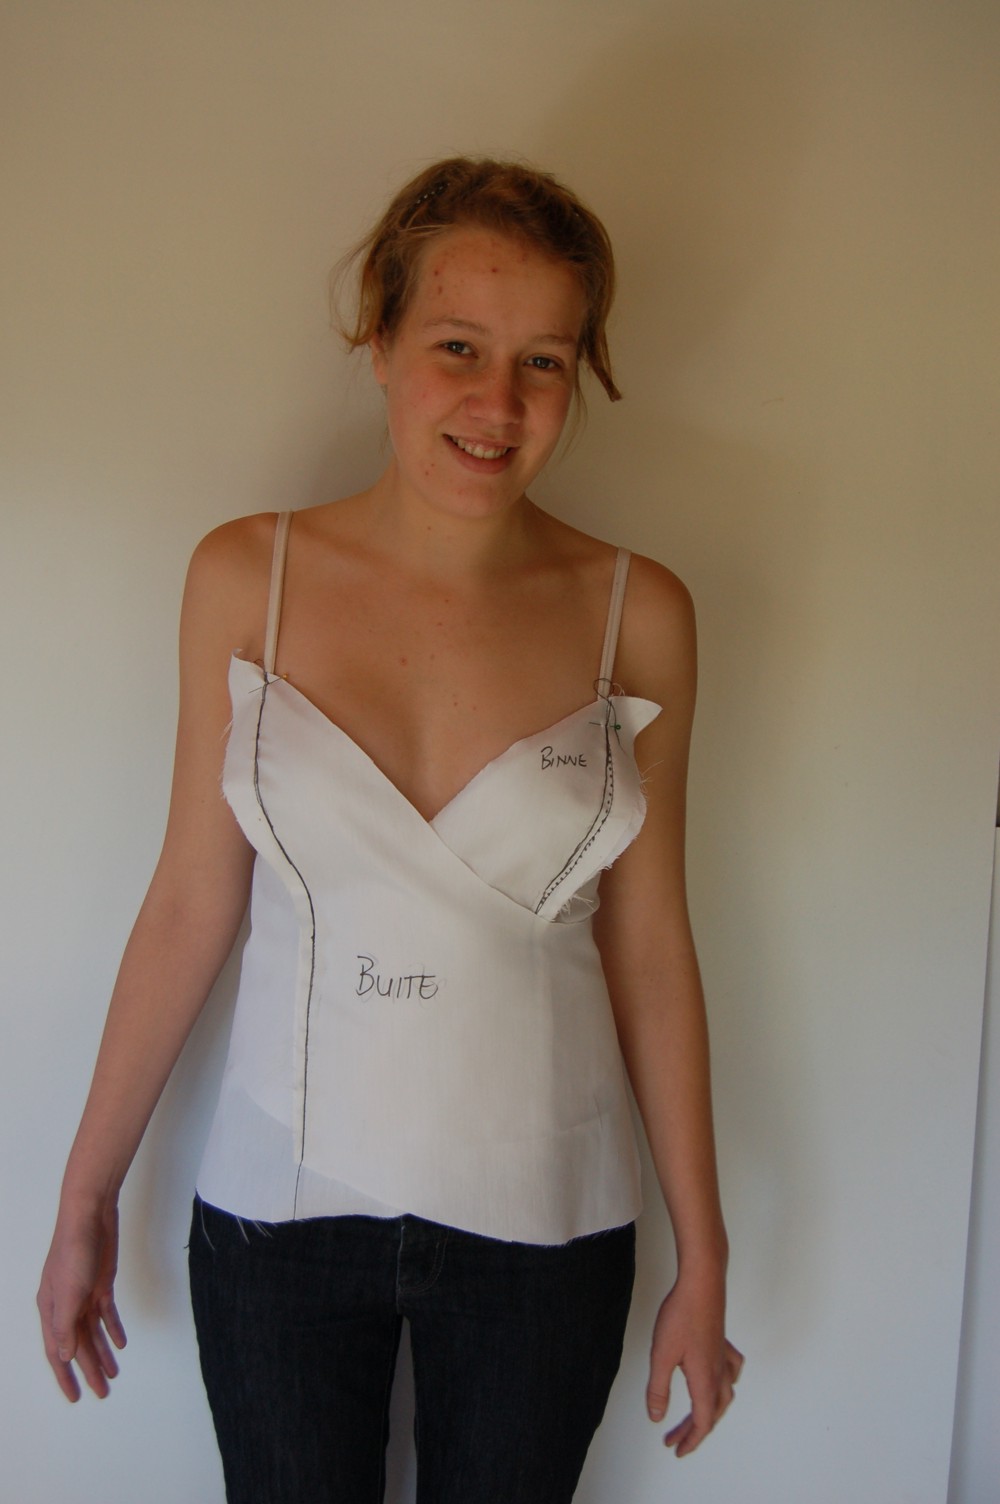
Happy with the fit of the bodice, I could start with the real McCoy! Note that it consists of two separate pieces.
Oh, and you might remember that seams on the bodice was a definite no-no ... Patience, me hearties! All will be revealed!
Firstly, I made the two bodice pieces using orange satin as lining. While she initially wanted something more muted, the colour worked really well with her creamy skin.
And THEN ...


... I started pinning the chiffon to the lining, with interfacing as delicate as cobweb between the two layers of fabric.
This literally took weeks!
Logically, one should be able to start pleating the fabric at the top and with a little give and take here and there, end at the bottom. Not so. On more than one occasion I had to remove a whole day's worth of pins and start all over again. (Oh by the way, I bought super-fine - and super-expensive - pins for the job. They did not snag the chiffon and thus made my job a lot easier).
After every 20 cm or so, I fixed the chiffon to the lining using my steam iron. I discovered that the steam blast is enough to melt the interfacing's glue and at the same time press the chiffon to the lining without creating a sharp edge to the little chiffon waves.

The result was a seamless bodice. On the photograph the seam on the lining is visible, but eventually it was completely invisible.
While this looked pretty enough, I doubted the strength of the bond between the fabric layers. I had to secure it ... and thus began the second phase of the development of the persisting pain in my neck:


Next step was to finish the bodice. The two pieces were each lined pillow-case style: Sew another layer on inside-out, turn it outside-out and close the gap. Then the two bodice pieces - each in a different colour chiffon, were sewn together at the back. I put a "ribbon" of bra eyelets, which I have coloured using silk paint, between the two pieces:

The bodice was now ready for the shoulder straps, but unfortunately, the crocheted straps did not work at all. The problem was the capricious nature of the chiffon. Check this out! The only thing a changed when taking these pictures, was the angle:


So HOW to accommodate all the colours???
In the beginning, Nina said we should colour bridal lace. Still, a single colour would not do the trick, so we used various colours of silk paint and allowed them to bleed naturally into one another.
Here is a test sample:

Notice the light pinkish fabric at the back. I coloured a piece of white chiffon to match Nina's skin tone. I used the chiffon to stabilize the lace. Here too I used the cobweb interfacing, as well as good ole' needle and thread.
'Lo and behold, with about a week to go, the bodice was finished!
The rest of the dress was fairly straight-forward. I first made a circle skirt, using the orange satin as a lining. This was topped with four layers of chiffon in alternating colours. I sewed the lining and the first layer of chiffon together on some bias-binding, and then I sewed the other layers together on another piece of bias-binding. The reason for this is that if Nina wants to use the dress again, she might choose to remove the top layers for a somewhat more grown-up look. Or not.
And here, dearest ones, is the end result:


And just because I think this is TOO cute for words: Pieter and Nina in 1994 and again in 2011!

♥
Nina looked magnificent - well done sis
ReplyDeleteAMAZING that the Car matched .....I was deathly afraid that the beasty would be this colour.. the OTHER orange
http://occarenthusiast.com/wp-content/gallery/noble-m400/button-willow-dce-race-school-oct-13-14-2007-029-medium.jpg
Great sketches Nina!
ReplyDelete